DIY FOR HOME DECORATIONS
There are few things that are as satisfying as pulling off a successful DIY project, especially when a guest asks where you purchased it. Here are the top three diy for home decorations which is shutter side table,canopy bed and double bathroom storage with easy build shelves that might help you to organize, entertain, and decorate your home with style, without spending a fortune.
1) SHUTTER SIDE TABLE

Shutter side table is actually a cute diy to placed our belongings such as lamp,vase,watch or many more near our bed so that we can easily find it.This shutter table diy can be fit in where ever we want it to be as it does not occupies a large space. This diy will be very useful especially for those whom find it really difficult to find their important belongings as the day began especially teenagers and working people.Below are the list materials required to make a shutter table and the ways of creating it.
What you need:
• 4 wood shutters, all the same size


Instructions:
- Stand all four shutters up and form the table shape; The four shutters together will make a square base.
- Grab a friend to hold the shutters in place, then measure the width of one shutter.
- Take that square measurement and purchase 8 art stretchers of the same or slightly larger measurement (stretcher measurement can be slightly larger, it just means the top will extend beyond the sides a bit).
- Piece the stretchers together to form two square shapes; one for the base, and one for the top of the table.
- Standing the shutters up vertically, place the frame on top of the four shutters.
- Drill 2 screws (evenly spaced on each side) through the frame and into the top edge of the shutter to hold firm. Repeat on the other three sides.
- Turn the shutter over, and repeat the previous step.
- Finish the wood stretchers with the same paint or stain as the shutter.
- Have a glass store cut a 1/4-inch piece of glass for the tabletop that will fit inside the canvas stretcher's beveled edge.
2) CANOPY BED

Canopy beds are actually an awesome diy that can make our room looks more attractive.Below are a few tips on how to turn your ordinary bed to canopy bed.I have also attached some pictures so that people out there whom are interested to try out this diy get some ideas to reshape their bed.
Some ideas for DIY canopy beds:
- Use odd bits lying around to create a boho, eclectic feel. Think fairy lights, different fabrics, rugs and lanterns.


- If you have any visible beams or piping, tie swathes of fabric from Lincraft or Spotlight to them and arrange to tumble down around your bed.

- Think outside the box. Why not try curtain rods screwed to the ceiling to hang fabric off. Or be different and try tree branches for a natural look.

- One of the simplest ones is to get a hula hoop, cover it in material like ribbon and then sew your canopy to that. This is really easy to do and pretty simple to mount from the ceiling.

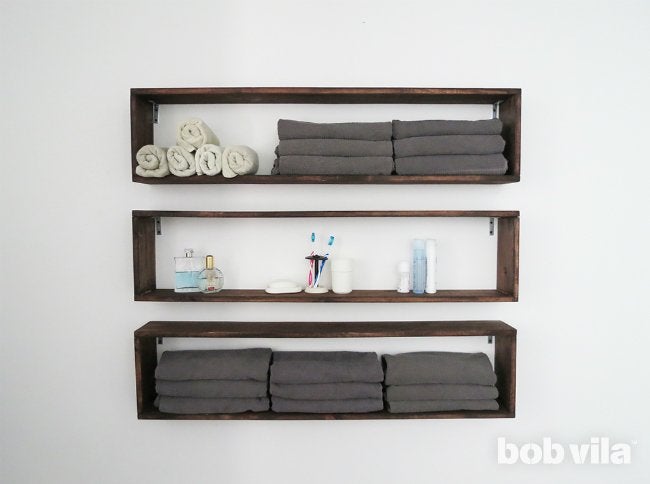
The bathroom can be a nightmare to organize, with all of its towels, soap bottles, grooming supplies, and other toiletries—and when you’re sharing the space, that’s double the stuff to store! To keep everything at arm’s reach while still clutter-free, try assembling an open storage system. Boxy wall shelves can be a good option, providing double the ledges for with each unit in case supplies start to overflow. Just follow those simple steps to set yours up ASAP.
MATERIALS AND TOOLS
– 1×6 lumber, 8-foot-long (4)
– Wood glue
 – Clamps
– Drill
– 1-½-inch screws (36)
– Sandpaper
– Wood Stain
– Varnish
– Brush
– Level
– Pencil
– 2-½-inch metal brackets (6)
– ½-inch screws (24)
– 4-inch-wide tins (optional)
Directions
- The dimensions for these 6-inch-deep shelves are easily adaptable, so you can shorten the length if necessary. To make three, you need to cut our lumber into the following dimensions: six pieces at 4 feet each, and six more at 9 inches each. (You can get these right at your home improvement store where you pick up your wood, if you don’t want to handle a saw.)
- Position a 9-inch piece perpendicular at each end of a 4-foot length plank, then join them with wood glue.
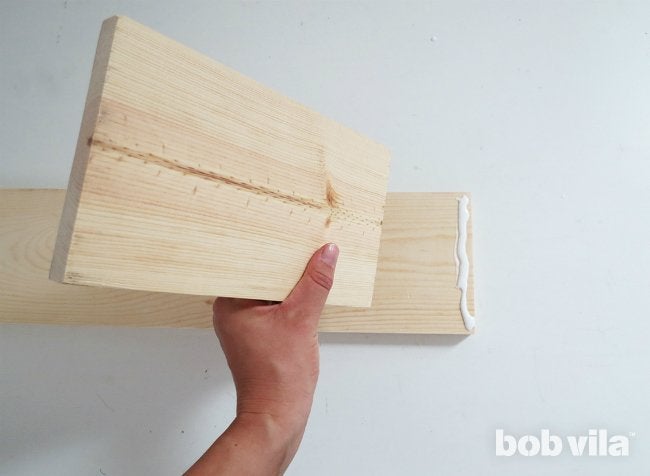
- Apply glue to the exposed ends of each 9-inch plank, then lay a 4-foot board across. Maintain pressure at the glued joints of this box until the glue dries. Repeat Steps 1 and 2 to construct two more boxes.
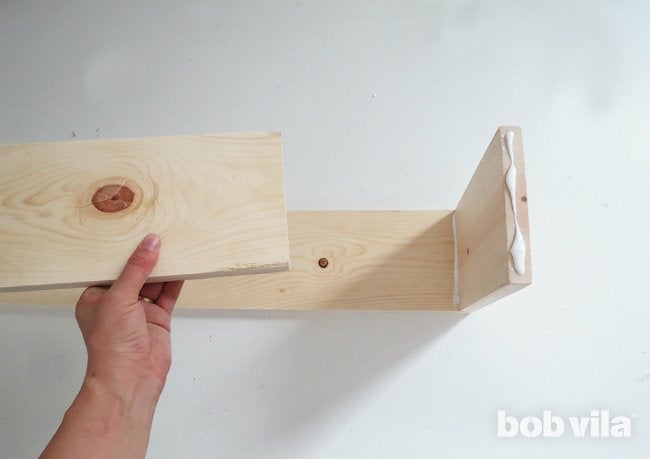
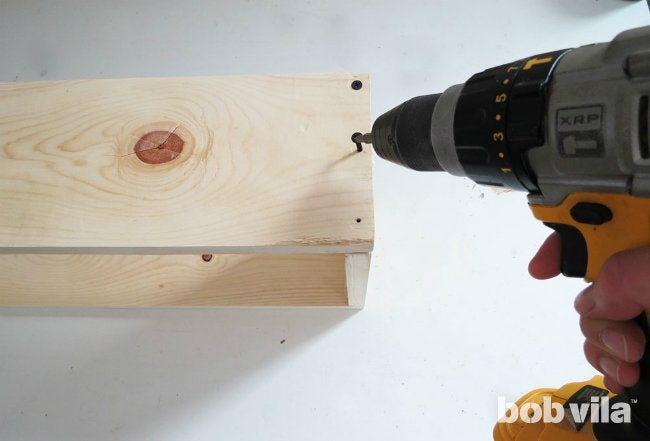
- Glue alone will not be strong enough to support the weight of all items to be stored on your shelves: guest towels, toilet paper rolls, spare shampoo bottles, and more. Once the adhesive has cured, reinforce the shelves with three 1-½-inch screws at both ends of each 4-foot cut. Tip: Pre-drill small holes and then insert screws in order to prevent the wood from cracking.
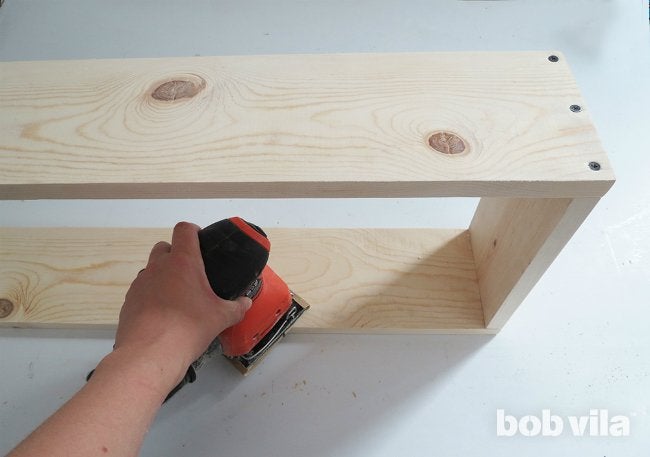
- Sand all of the new boxy shelves, particularly along the edges, to remove splinters. Start with a coarse 100-grit sandpaper, and finish smoothing the surface with a finer 150-grit paper
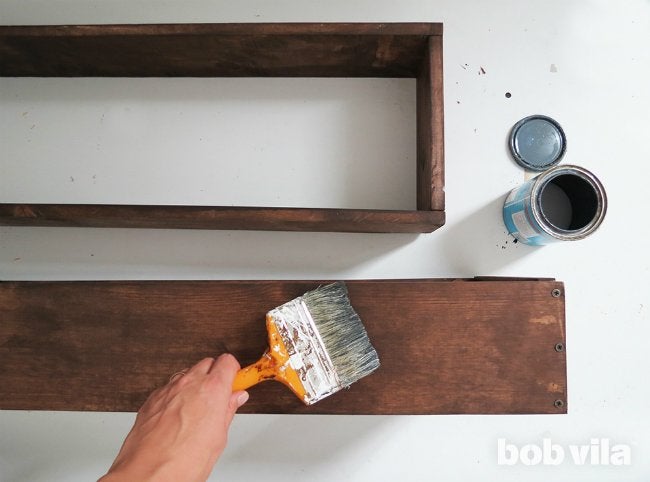
- Color your assembled shelves with a wood stain of your choice, following the package’s instructions to a tee. After one or two coats have dried, seal with a coat of acrylic varnish. If you’d rather, you can paint the shelves a color that blends your shallow shelves in with your bathroom walls—just be careful to choose a satin or semi-gloss finish that resists water, as the bathroom will likely to be very damp after steamy showers.
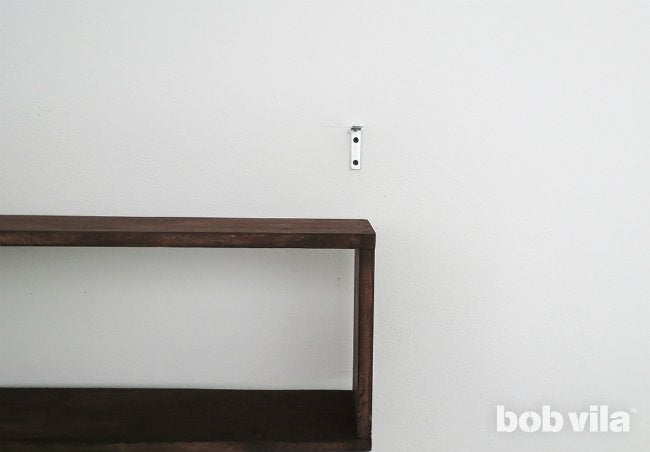
- Time to hang your new wall shelves! Determine where you’d like to position the set, exactly how high above the floor and how far apart from one another. Hold the first shelf in place, checking that it is completely horizontal using a level. Mark the inside of the two top corners on the wall. After you set the shelf down, affix a 2-½-inch bracket to the wall at each mark using ½-inch screws. You will need one bracket at each corner of the box.
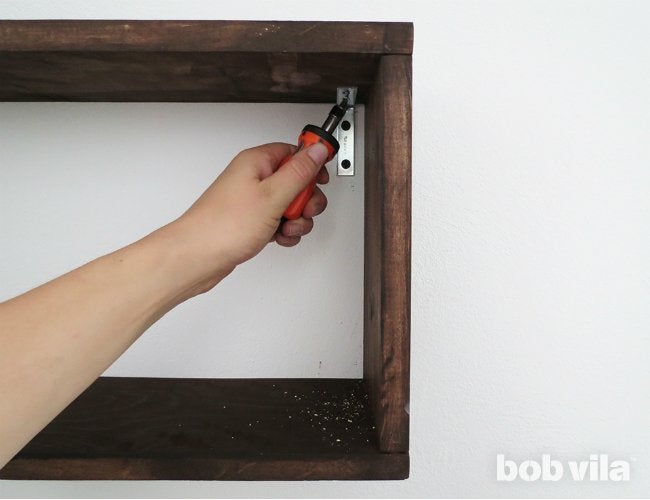
- Lift the box shelf so that its top rests on the brackets. Pre-drill through the brackets’ holes into the wooden shelf, and secure with screws.
- When you go to hang the second shelf, try this trick: Place three emptied tins that are the same size as your desired distance between shelvesacross the lowest shelf, then rest the next shelf atop of them. These helpers will keep your hands free!
- Rest a level on the whole stack to ensure the second shelf is horizontal and also aligned with the one beneath. Mark the inside top corners, remove the second shelf, and screw the brackets into the wall at these marks. Hang the shelf over the two brackets, and screw it into place.
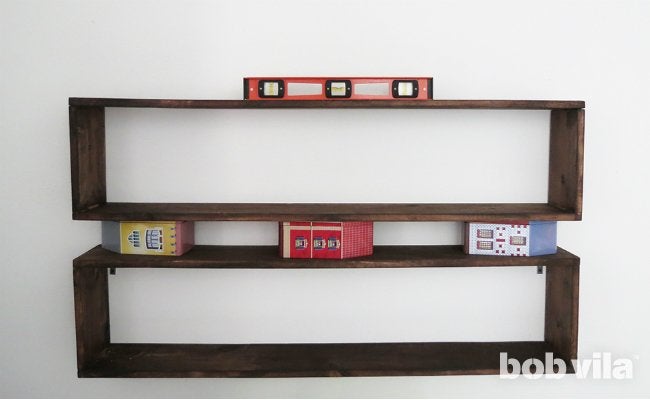
- Repeat this step to hang the third shelf at the top, and you’re all set to fill the 6-inch-deep ledges with all of the toiletries that you can’t cram underneath your sink any longer.

Great
ReplyDeletethanks
Delete